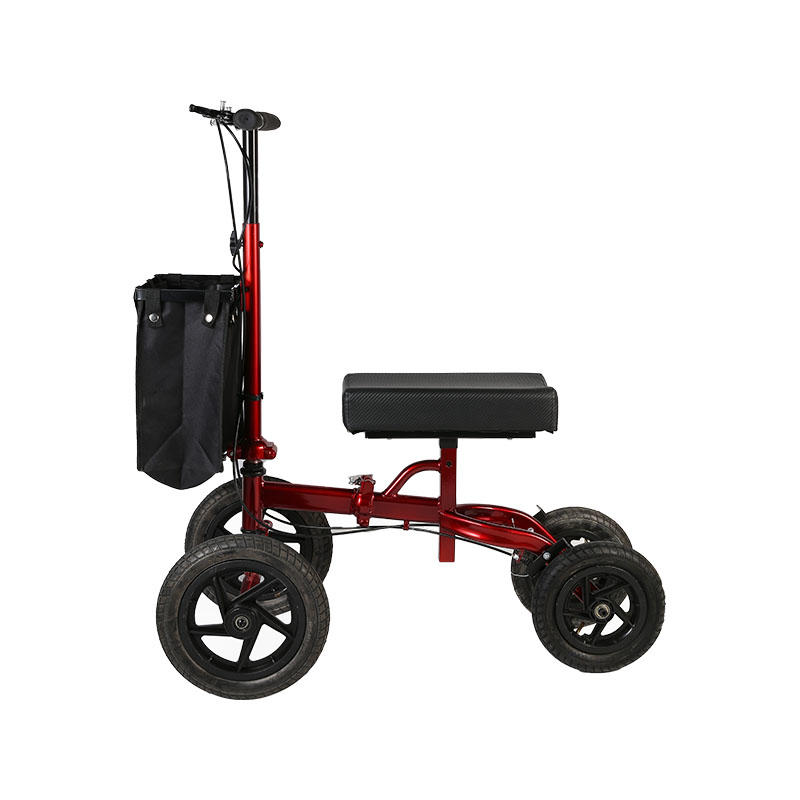
Advantages of knee walker over crutches
2. On a lap scooter, you rest your injured leg on padded knee support instead of lifting your injured leg while supporting yourself on crutches.
3. Crutches are physically demanding and require a lot of upper body strength to use.
4. Crutches can put a lot of pressure on your shoulders, underarms of your hands, and elbows.
5. When using the lap scooter, you can almost glide because of the wheels. You are using minimal physical strength to operate it.
6. Compared to crutches, you can get from point A to point B very quickly and easily.
7 Every task that needs to be done becomes easier because you can use both hands. You can turn on the faucet, carry items with you, cook, and more. All-terrain lap scooter models can be used to travel on outdoor surfaces with ease.
The safety tips for using the knee walker are as follows
1. Do not taxi at high speed.
2. Always slow down before turning. Use the brakes accordingly.
3. If going downhill, be extra careful and move at a slow and controlled speed. Use the handbrake and feet at the same time to control speed.
4. Always keep your body in balance with the
knee walker . If you need to reach for something, park the scooter as close as possible to where you need to reach. If you want to reach things on the floor, we highly recommend using the fetcher, it's a great accessory for recovery.
5. When you need to use your hands to do housework, always lock the brakes for added stability.
6. If your scooter has here on the steering column, do not place heavy objects (or bulky decorations). This will make the knee walker top-heavy and prone to tipping over.
7. Do not bring children, other people, or pets with you when riding the lap scooter. You will tip over and risk re-injury.
How to use a knee walker
1. Adjust the height that suits you
The
knee walker is the same as a normal bicycle, the two main parts that need to be adjusted are the height of the knee rest and the handlebar. The correct knee pads and steering column height vary from person to person. Some lap scooter models allow you to adjust the orientation of the knee pads to properly support your left or right foot. With knee pads, it can be adjusted to better support your left or right leg. It helps the knee walker to be more ergonomic and provides better resting comfort for your injured leg.
First, unlock the knee brace and remove the entire knee brace column from the main frame. Adjusting the height of the knee rest requires the person to stand upright and hold onto a stable object. Bend the injured knee 90 degrees. Measure the distance from the bottom of your bent knee to the floor. After noting the distance between your knees and the floor, adjust the height of the knee pads to match the same distance. The height from the surface of the kneepad to the floor should be equal. Follow the lap scooter owner's manual to properly raise or lower the knee post and lock it securely in place.
Next, adjust the handlebars so they are about the same height as your waist. Unlock the handlebar height adjustment knob and set the height accordingly.
Finally, adjust the height of the knee rest and the handlebar to a suitable height, then the initial setting is completed.
2. Lock the brake
Before you can use the knee walker, you must engage and lock the brakes. Locking them is essential, mainly when first getting used to the scooter. It provides stability and prevents the scooter from slipping away. The locking mechanism is different for each model; see your model's owner's manual on how to lock the brakes.
3. Put your hands on the handlebars
Stand next to the knee walker with your injured leg next to it. Grab both handlebars before "stepping on" the knee walker. Doing this will keep the model stable and give you something to hold securely.
4. Install the knee walker
While still holding on to the handlebars, place the injured leg on the knee support while placing the uninjured leg on the ground next to the knee walker.
5. Ensure stability
You should be standing in an upright posture, comfortably supported by your good leg. You should not bend over to look at the ground. Your injured leg should rest on the knee pad at a 90-degree angle, and your hip should be flat. Make any necessary adjustments to the knee rest height, if needed.
6. Unlock the brakes
This step is the official start. You have to learn how to brake in time, and then practice a few more times. Stay away from any surface that could break, tip over (such as next to a shelf with glass), or be uneven and bumpy while performing this step. Hold the handlebars with both hands and use your good feet to propel yourself forward.
7. Make the right turn
Turn the handlebars to steer the wheels in the direction you want. Take note of the model's steering capabilities. Most models can be turned 40-45 degrees. Depending on how tight the corner is, you may need to do a three-point turn. With practice, this will become more natural.
8. Safely remove the lap scooter
When you arrive at your destination, removing your walker is like getting into your car. Always come to a complete stop before getting out of the vehicle. Remember to use the handbrake to slow down and the footbrake to come to a complete stop.

 English
 Français
 Español
 Deutsch


